Creating WordPress Featured Images in Lightroom
A featured image in a WordPress post is especially handy if you like to use Read More… links to keep the front page uncluttered. If there’s not a featured image, the post is just a headline and excerpt and any images that could attract a reader are buried “beneath the fold” as newspaper people like to say.
Usually you can get away with just using an image from the inside the post as the feature. This works, but you get a random crop depending on the style used on your blog. I also like a more narrow banner-style image than the fatter default size. Plus if you want to create a feature that’s a collage of several pictures from the post, WordPress can’t help.
I’ve started using Lightroom to create my customized featured images so I don’t have to export then edit them in another program. The trick is use the print module. (And presets, which are included below.)
The print module can also print to a file instead of paper. This is how we’ll be exporting our finished image. But first theres a few things that we need to set up.
Output specifications
I want the output size to be 900x150 pixels. This aspect ratio is one that I like because it looks like a banner image and doesn’t take up too much vertical space. It’s also wide enough that I don’t have to worry about which WordPress template I’m using. It’ll also fill the post column like a good featured image should.
Paper size
Everything in the print module is based off of paper size, so to get our pixel size we have to use PPI (pixels per inch) to convert pixels into a linear measurement (I’ll be using inches, but the same applies to centimeters).
Since the banner is to be 150 pixels tall, we’ll use that as our conversion factor. To get our inch value, we just need to divide our pixel size by our PPI of 150.
150 pixels ÷ 150 PPI = 1 inch

950 pixels ÷ 150 PPI = 6 inches
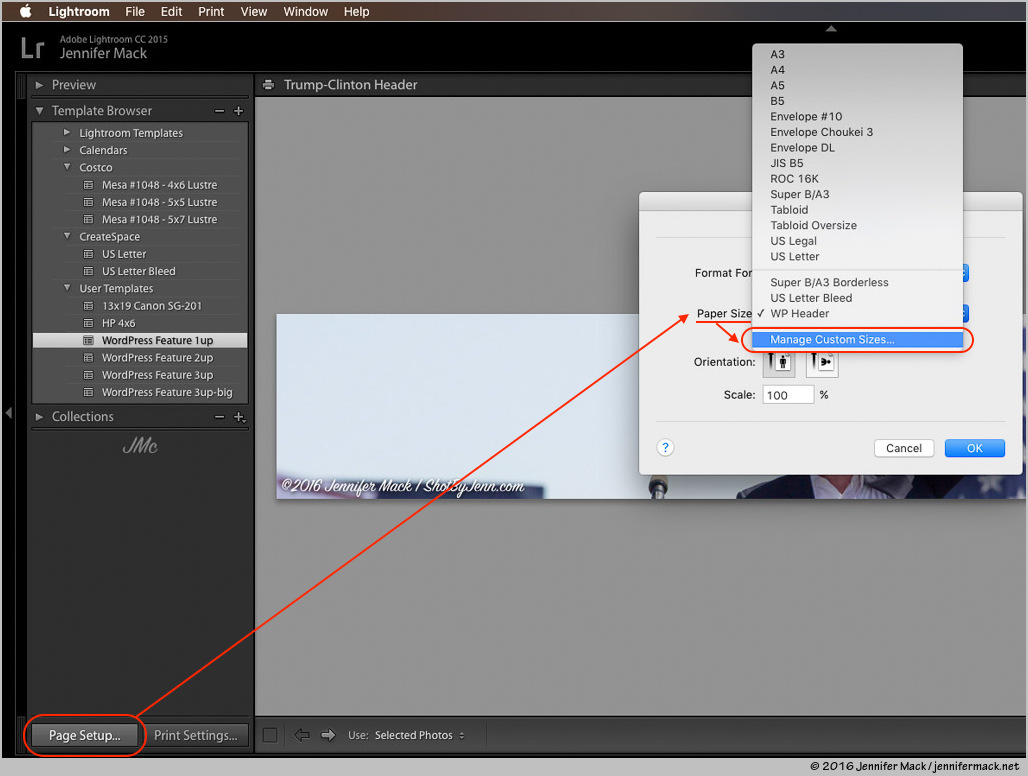
So now we have a paper size of 1x6 inches. All we have to do is create a custom paper size using those dimensions. In Lightroom switch over the print module, and click the Page Setup button in the lower left. Once the Page Setup box is open, click Paper Size then scroll down to Manage Custom Sizes.
+ to create a new paper size. I renamed mine WP Header, then set the size to 6” wide and 1” tall. Make sure to set all of the borders to zero. Then click OK to save.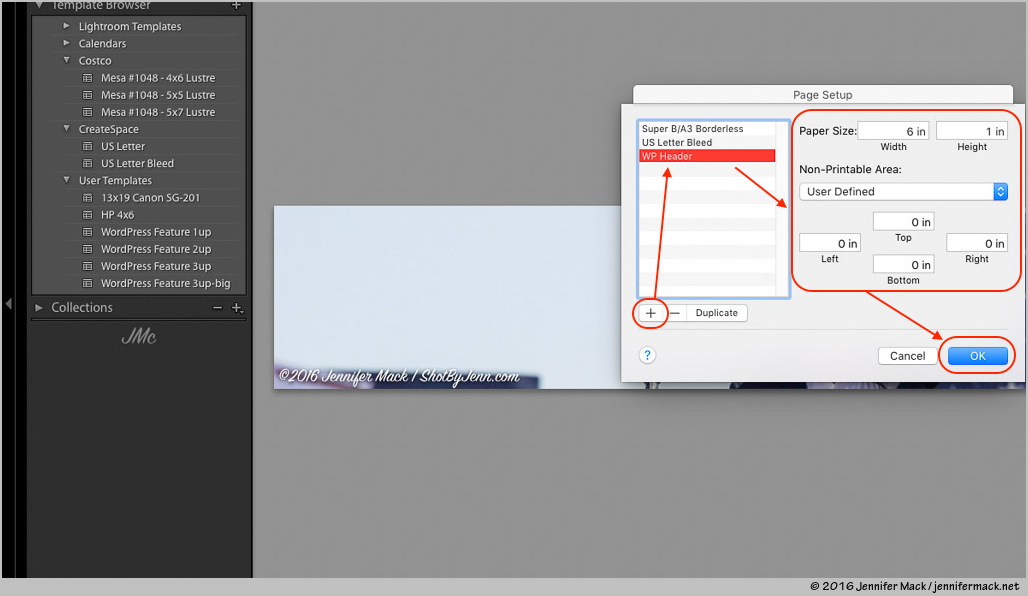
OK.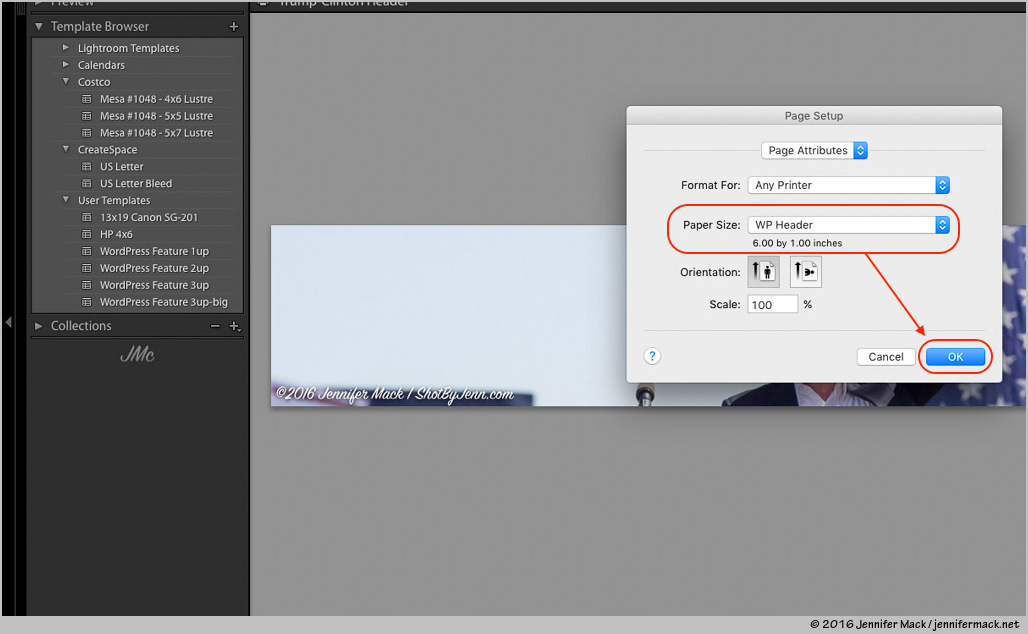
Lightroom print setup
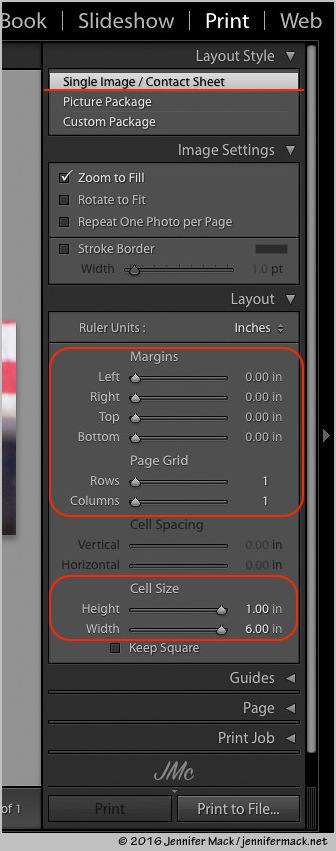
Now Lightroom should be showing you our new banner-size blank page. Select Contact Sheet and make sure the border sliders are set to zero. Selecting an image from the filmstrip will show it on the banner. You can adjust the positioning to get the crop you want.
+ in Template Browser bar on the left side. I named mine WordPress Feature 1up.
To have two images side-by-side, change the Page Grid column slider to create two columns. Now selecting two images from the filmstrip will plug them both into the banner. Make sure to save this as a preset too. WordPress Feature 2up is a good name.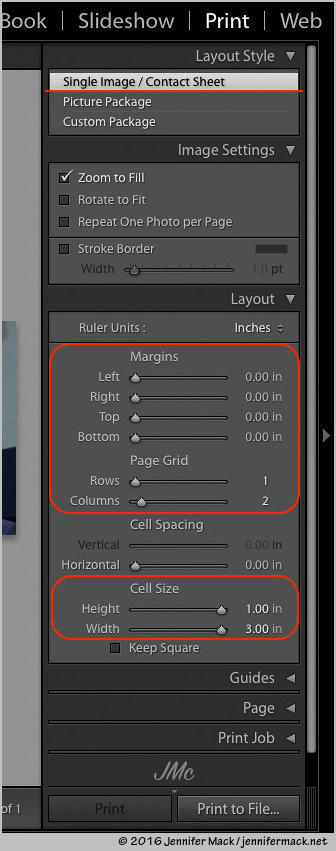
3 and save the preset as WordPress Feature 3up.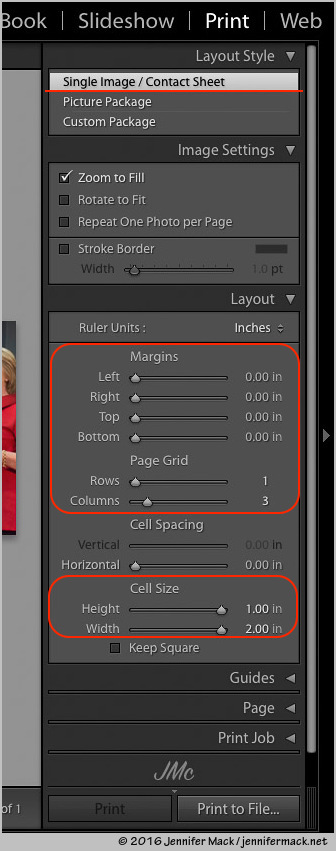
Stagger block layout
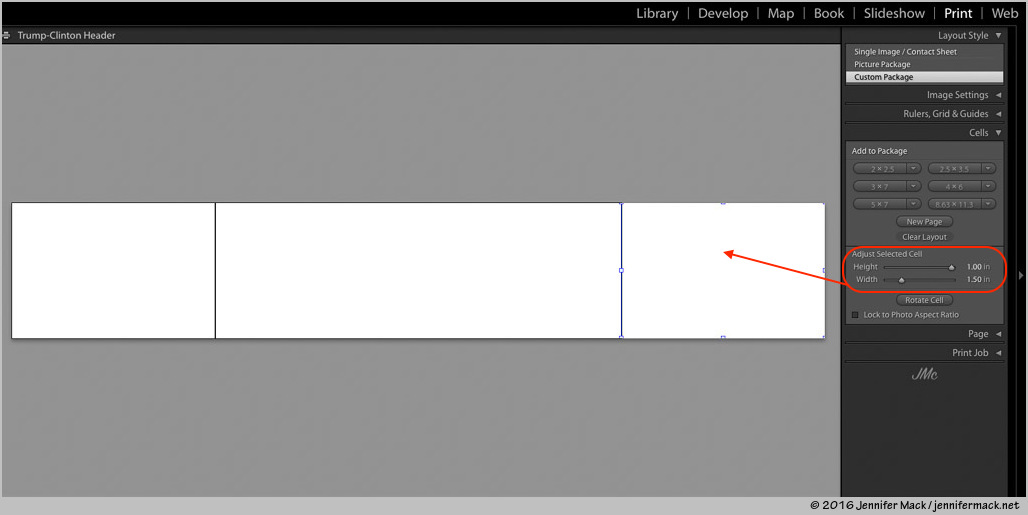
Another neat trick for creating a multiple image banner is to have the middle image bigger than two side images. This takes a bit more work but looks good.
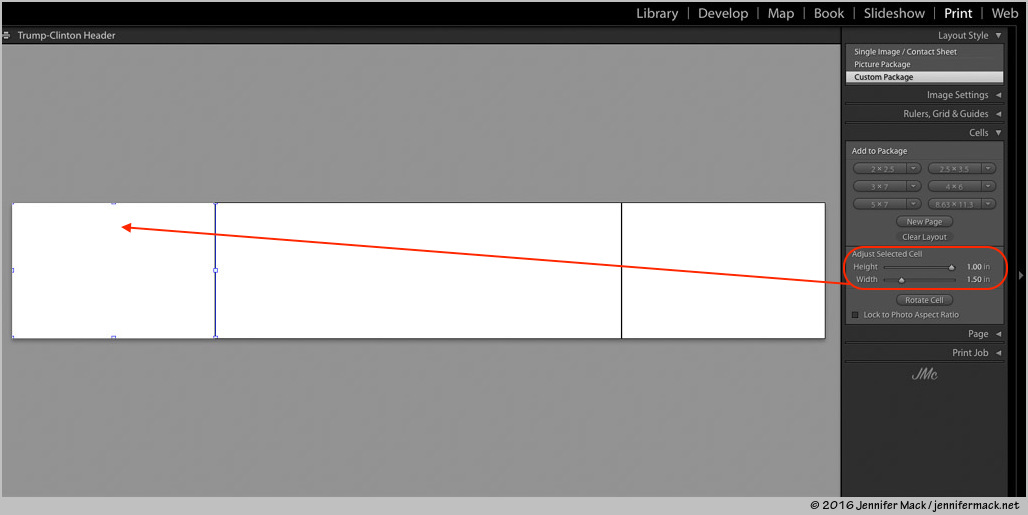
First switch the Layout Style to Custom Package. Then click Clear Layout to start with a fresh page. Our custom paper size should still be selected. If not, do that now.
Click any of the Add to Package buttons to lay down the first frame. It’ll clip to fit, then drag the width slider to 1.50”.
Add to Package buttons to lay down the second frame. It’ll clip to fit, then drag the width slider to 3.00”.
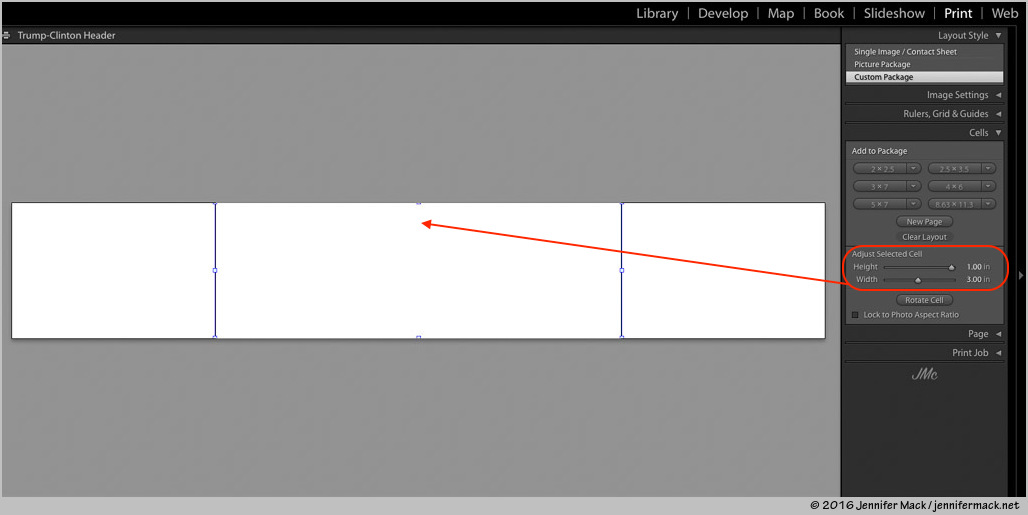
Add to Package a new page will appear. Drag the frame from the second page up to the first then adjust the width to 1.50” and delete the second page by clicking the X at the top left of the second page. You might have to drag the third frame all the way to the left to position it.
Print to file settings
The print settings are straight forward, make sure you’re set to print to JPEG File, and the DPI is set to 150 (dots per inch, it’s the same as PPI but the print module thinks we’re sending this file to a printer that’s going to make dots on paper).
Since this needs to be fast-loading header images, make sure the JPEG Quality is turned down. I find 60 to be a good setting. Having the color profile set to sRGB maximizes compatibility when viewing on the web.
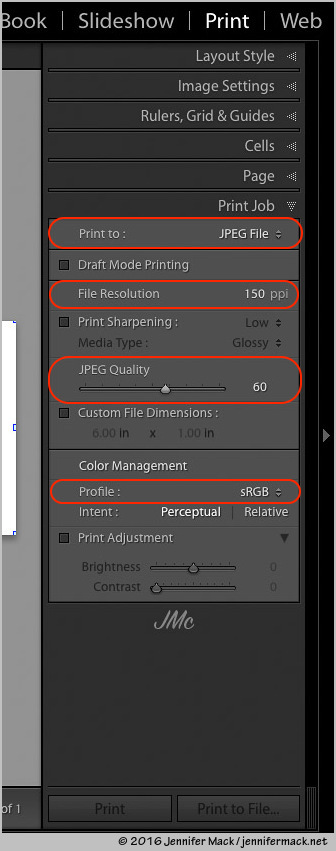
After this, click Print to File… at the bottom right and select a location to save your new banner. I usually dump them to the desktop so I can easily find them.
Once the banner is uploaded to WordPress I can use the featured image selector to add it to a post. As for the file on the desktop? I delete them. There’s no point in saving something that you can easily recreate with a few clicks.
What I really like about this system is it all happens in Lightroom. Once the exported file lands on my desktop it’s ready to upload. I don’t have to worry about opening Photoshop to composite the images and there’s no intermediate files to keep track of.
As for keeping screen shots in Lightroom? It’s convenient and I have a post planned about how I do it.
For a bonus, I’ve zipped up my saved presets, and you can download them right here. I hope you enjoyed this and find it useful. If you’d like to support the creation of more tutorials like this please donate with either PayPal or credit/debit card. Thank you.